
Introduction
So, you want to start your audio and music journey, and you are interested by trying this REAPER software someone great (obviously) told you about? Nice! 😉
As REAPER is affordable and lightweight, it is indeed a good choice for beginners. And especially for those who want to be able to scale their game to reach professionals results. This is also thanks to its customization possibilities, its modularity, and thanks to the fact it is a really advanced software on its own.
Yet, REAPER isn’t especially designed for beginners. So there might be some difficulties which can prevent to jump into it easily on your own:
- The default settings need a bit of tweaking to make things more accessible
- REAPER doesn’t come with any samples or virtual instruments, apart a minimal synth, which isn’t convenient for those who wanted to make electronic based music out-of-the-box quickly
- There are some must-have REAPER resources but they are a bit scattered on the internet
It can definitely be hard and confusing without any prior experience in computer Audio or friendly knowledgeable person around to overpass these essential steps. Fear no more, this article is here to guide you!
So, the goal here is to resume, as a single page checklist, the answers to the following questions:
- How would I personally setup REAPER on a beginner’s computer?
- What resources do I showcase to a REAPER beginners so that he/she can continue from there on its own?
The answers are highly subjective, based on my personal preferences and experience, and on what I think works well for new comers. I hope it can be useful to both beginners and teachers. And why not, to people coming from other DAW, though I will consider that readers of this article have no experience with digital audio.
Making a REAPER setup from scratch isn’t the fun part, sure, but it really worth taking the time to make it right, so you will be able to jump into your projects right ahead, without being interrupted because you realize you miss something. And this article should help you start quickly. You will be able to focus on learning useful REAPER technics in no time!
Don’t be intimidated by the number of steps showcased here: most are optional, self-explanatory, and can be done later when needed. Though digital audio do requires a bit of computer skills (and maybe especially for professional-grade softwares), these steps are not too complex, just a bit boring when done several times (for eg., when you need to create user accounts on third-parties website to download plugins, or read long article like this one… 😉). Anyway, to not overflow the article, it will mostly be a list of links, from where you can get more infos about each showcased resources.
Estimated time: between 5 minutes for the most minimal set up (driver download + REAPER install), to a couple of hours (virtual instruments install, samples download, etc), depending on the number of extra resources (mostly, audio and instruments plugins) you will consider relevant, and your overall ease with computers in general. What take the most time is to find stuffs, but be reassured, I made this hard work here precisely for you. 😎
Enough talking, just let’s go! 🚀
Audio Interface Driver
As a per-requite before digging REAPER, let’s talk about audio interfaces.
REAPER will need to communicate with the device handling audio inputs and outputs on your computer: the interface. For that, it uses a type of software called a “driver”, which allows communication between the operating system (Windows, MacOS, Linux…) and a device.
External Interface
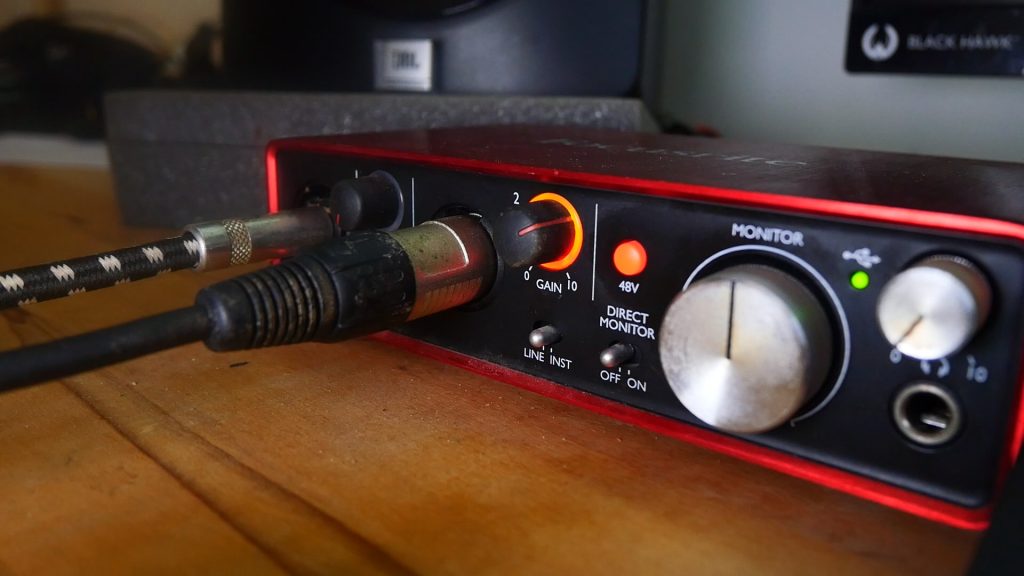
If you have an external interface, just go on the manufacturer website, and download the latest driver associated to it. It will allows you to take full advantage of your device (managing all its input and output, reaching audio low latency, etc).
No External Interface
If you don’t have an external audio interface, but you plan to get serious about sound making, I will strongly encourage to get one. It should be one of the first thing to consider buying when entering audio world. It will allows you to have good pre-amplification for microphones and electronic instruments (guitars, bass…), and to have various in-out possibilities, using industry standard connections. And mostly, it will allows you to have Low Latency audio monitoring.
Low latency is needed for instant monitoring of processed signal (for EQ, if you record electric guitar with virtual amps effects, or if need to send the processed voice signal to the singer headphones, etc), or if you play any virtual instruments from a MIDI controller. If output signal delay is more than 10 milliseconds after the input, it will be disturbing to hear, and harder to record. I usually set it to 6ms while recording.
Interface Recommendations
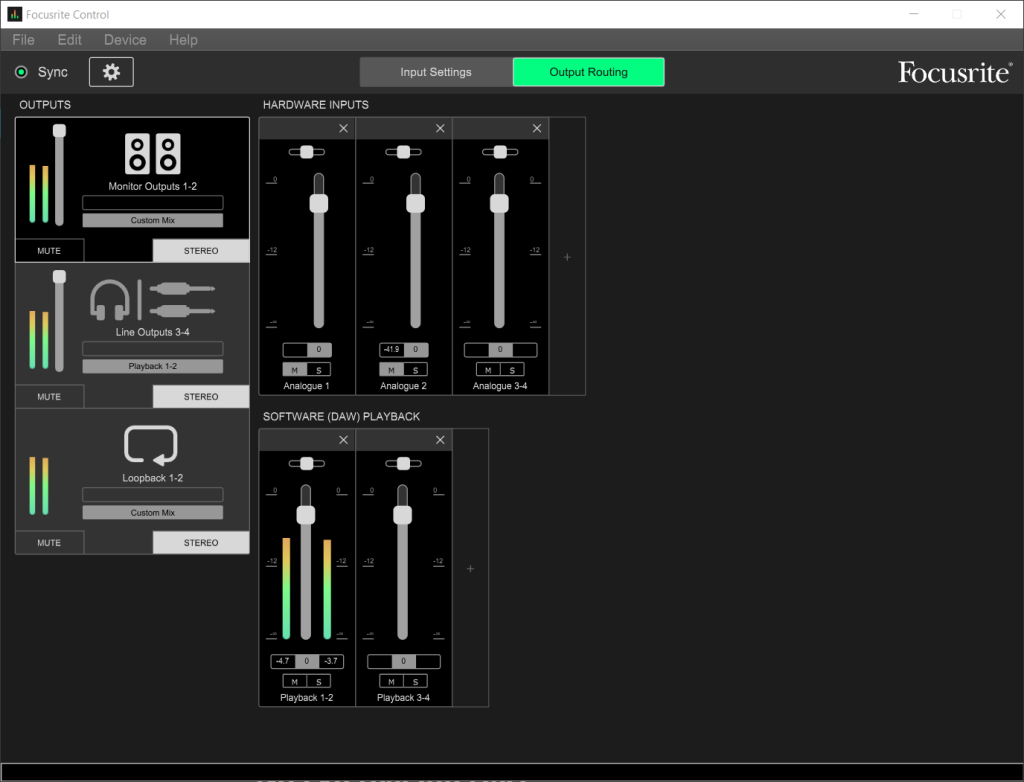
I personally use Focusrite Scarlett, they are excellent for the price. There are several versions depending on the number of inputs/ouput you need, and on the generation of the device (currently, the 4th). You can consider buying one from a previous gen if you are on a tight budget, they are still relevant! Some plugins are offered with Focusrite devices, which can be wlecome. They can also be purchase as a kit with a good polyvalent RODE Microphone, which is definitely a solution to consider if you don’t have any audio material.
There are of course course a lot good alternatives, like Audiobox, Komplete Audio etc. Take the time to compare, to see what fit you the most, in terms of features (mostly, number of inputs and outputs) and pricing.
Windows
Windows can use an built-in audio driver called WASAPI. It is ok, but it can’t reach low latency. If you don’t need instant monitoring, for eg. if you do just editing and mixing, that’s can work ok and you can go to next step. But if you do, there are few things to know.
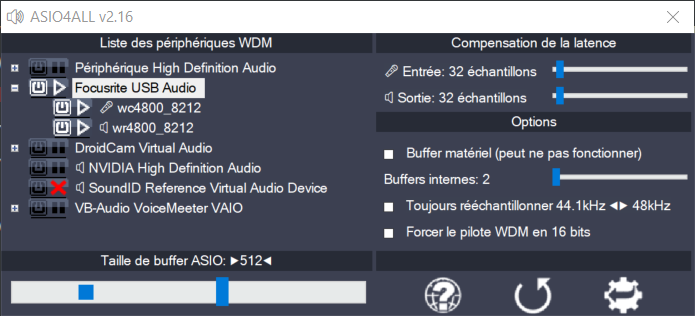
To reach low latency, Windows use a communication protocol named ASIO. Audio interfaces come with ASIO drivers. Without audio interface, you can try to reach low latency, by using a Virtual ASIO driver. These are handy, but they still have more latency than any audio interface (I couldn’t get below 20ms on my system with all virtual ASIO drivers I tried, it wasn’t even better than WASAPI), which is still way too high for being able to play a MIDI instrument nicely or play guitar.
So one way to solve this would be to get an audio interface, as explained above. It seems to be the only reliable way, and is by far both the most powerful (it will allows you to plug audio devices to your computer), and the simplest.
Meanwhile, if you are fine with WASAPI, use WASAPI. If you are not, you can try various virtual ASIO drivers. The most-known is ASIO4ALL. But it doesn’t allow to have sound both from REAPER and another software (it works in exclusive mode only, which give better latency than shared mode). Alternatives would be VoiceMeeter, or the recent and open source FlexASIO+GUI, or the simpler KoordASIO). You can also have several installed, and switch drivers depending on context.
Mac – Linux
Mac audio engine (Core Audio) and Linux (Alsa) are good enough out of the box. As far as I know, they are relatively low latency. You can continue your setup. Still, consider buying an audio interface for the other advantages it offers!
MIDI Hardware
If you have MIDI hardware (keyboard, drum pads etc) which come with dedicated drivers, and/or have an updatable firmware (device on-board software), I think it is a good idea to update all these. Just check on the manufacturer website to see what they propose. If the firmware update seems simple enough, it may worth considering.
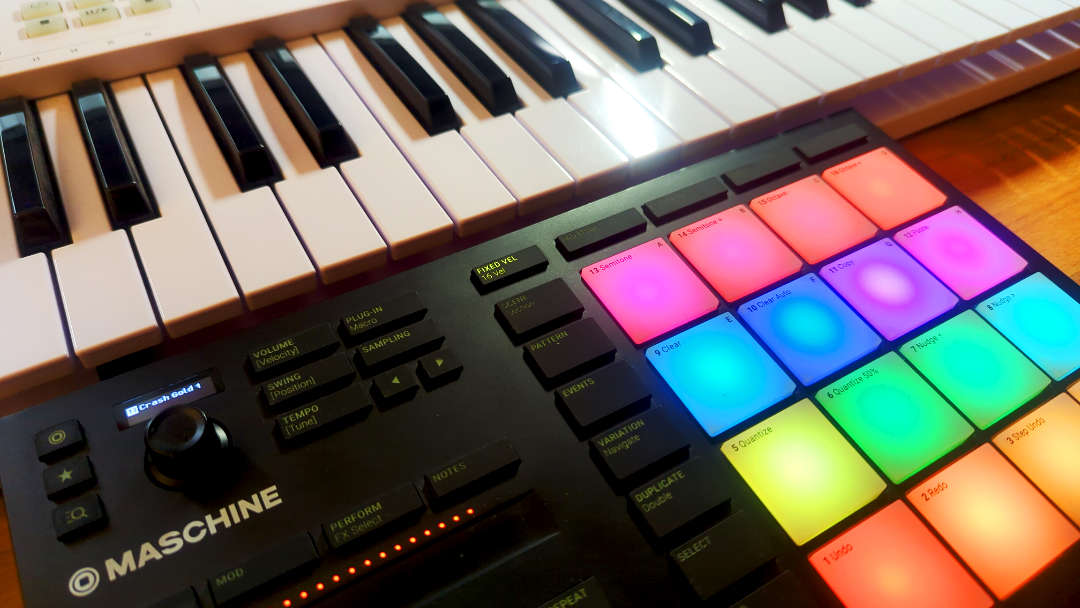
Some MIDI hardware can have dedicated softwares to manage both drivers and firmwares, like Native Controller Editor for Maschine MK3 or the MIDI Control Center for the Arturia Beatstep, in a simple way. Some simple device will be just fine without any special driver (just plug via USB) and without any required firmware update.
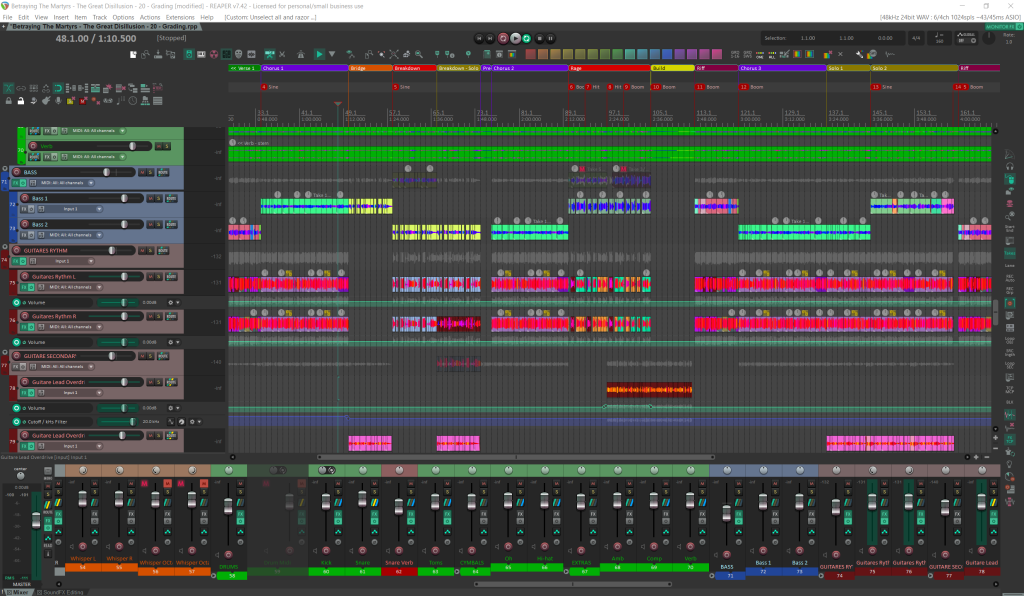
REAPER
-

REAPER Official Website
This is where it all begins.
Once your interface is setup, you can download REAPER on the official Cockos website. It should take only few seconds.
You can then launch it to see if is good. It will prompt you to chose an audio driver. Pick the one you chose to use in the section above.
This was the standard minimal REAPER installation everyone do. Now, let’s push this further!
Config: X-Raym REAPER Config Zip

Over the years, I elaborated and fine-tuned a Config Zip for beginners, which included handy default settings, toolbars, project templates, etc… You will see the install instructions on the dedicated web page.
It features my X-Raym Analog theme, which may not be the most advanced theme out there, but it answer my needs, and it is somehow the preferred one of all my collaborators. 😉It is not mandatory though, feel free to restore the default theme, or to use another one (more infos on the Config Zip page).
Extension: ReaPack
-

ReaPack
A free package downloader REAPER extension to download lots of user-made resources (mainly scripts).
ReaPack is a free open-source extension for REAPER, which allows to download other user-made resources, right from REAPER. Download it from reapack.com, and install it, we will need it for the next steps.
Installing ReaPack is simple:
- Download the ReaPack file associated to your operating system (it will likely be the x86 64-bit version, unless you use an ARM processor – if you do, you will most likely know it)
- Put it under REAPER UserPlugins Resource Folder, accessible on the menu Options → Show REAPER resource path in explorer / finder.
Once it is installed, launch REAPER and click on menu Extensions → ReaPack → Synchronize packages, to get the extension and scripts used by this config.
Included ReaPack Repositories
For references, here are repositories included in my Config Zip:
- ReaTeam Extensions, for the SWS Extension, ReaImGui, an JS_ReaScriptAPI
- X-Raym Free Scripts
- souk21 (for the audio buffer selector script)
- Heloboss ReaLearn
Also, ReaPack preferences is set to Automatically install new packages (which is off by default).
Extension: SWS/S&M
This extension is the most popular REAPER extension, cause it brings a lot of nice features to REAPER which are useful to every users, beginner or advanced. I consider it as a must-have.
It is free and open source, and can be downloaded manually on the dedicated SWS website, or even better via ReaPack, from ReaTeam/Extensions repository. It is already pre-selected for ReaPack in my Reaper Config Zip, so if you followed steps above, you should already have it downloaded and installed.
-

SWS Extension
The most popular REAPER extension.
ReaPack: X-Raym Free ReaScripts
I share a tons of free scripts for REAPER, and to be honest, it is hard for me to be without, as they bring quite some ergonomics enhancements. These free scripts can be downloaded from ReaPack, from a repository which is already pre-selected in my Reaper Config Zip.
So, if it is not already done, just synchronize ReaPack packages (see ReaPack section), and you should have all my stuffs. Note that if for some reason you don’t want to use ReaPack, these can be downloaded manually, from my free scripts dedicated page.
Langpacks
REAPER has only one officially supported language: English. So if you are fluent in english, I will advice you to keep it in english, it will also be easier to follow tutorials or forum discussion (as most of them are in english).
If you need other languages, you can download .ReaperLangPack files, which are just text-based Translation files associated to one language in particular.
All these Langpacks are made and shared freely by users from the community. Translation take an immense amount of time, and lead to lot of very complex linguistic and technical consideration, so thanks to them for their hard work!
Because it is benevolent work, not all translations are up to date (would be nice if Cockos sponsored translators). Among the best maintained langpacks, we can mention the French version, the Russian version, the Portuguese-Brazilian , the simplified Chinese, the German, the Spanish, the Japanese and few others.
There is no centralized place to get them, it is up to the translators to chose what they prefer. Most Langpacks are available on Cockos user files hosting platform, Stash, under the Langpacks category. Some are shared via cloud hosting like Dropbox. And a few other are shared via ReaPack, which allows to update it right from REAPER regularly (the other methods need the users to manually check if there is an update and to download Langpacks manually). Unfortunately, not a lot of translation teams chose this solution, as it is a bit more technical.
Anyway, it is expected that a translators team create a dedicated thread to promote or discuss their translation, so a simple regular search engine query should tell you if a particular language is available, and where to download it.
The installation is simple: just double click on the LangPack file, or drag and drop in REAPER UI, and it will be imported into REAPER. You will just need to restart the software and it will be good.
Free Plugins
REAPER has a tons of built-in FX plugins, if you count ReaEffects and JSFX. Though, they are very good reasons to download third-parties ones, including having better UI, better sound, more signal processing modules, and especially, virtual instruments, like Synths, pianos, or drums VSTi.
Below is a list of articles I just wrote about what the best plugins and samples you can find for free online. Be aware of resources marked as Must-Have ⭐. Downloading and installing various FX and instruments is definitely what will take you most the time in this REAPER setup, so focus on your needs for now.
-
Best Free Audio FX VST Plugins (2026)
The best free Audio FX VST plugins, especially handy for REAPER users.
-

Best Free Instruments VST Plugins (2026)
The best free Instruments VST plugins, especially handy for REAPER users.
-

Best Free MIDI FX VST Plugins (2026)
The best free MIDI VST plugins, especially handy for REAPER users.
Samples
REAPER doesn’t come with any audio files to play with out of the box, so if you want to use some, you will need to download them on your own. Below is a list of good free samples resources:
-

Best Free Sounds Effects and Musical Samples (2026)
Sound files packs to free to download.
You have downloaded and installed things you needed? Good, your setup is ready! You just now have to learn how to operate it! 😉
Learning
A lot of directions are possible from here. You can start learning more about recording, mixing, composing ambient electro, finding the best metal guitar tone, recording vocals for audio fiction, or just getting nerdy with REAPER itself and learn all the tricks.
That’s when we really start making sound, with people I teach REAPER to, depending on the direction they want to explore.
REAPER and other DAW have steep learning curves, so once you will get the basics, it can only be smoother. Practicing with a friend, in a training course, or at local groups and events meant for people starting music composing, mixing or other audio work, would be a great way to learn.
Else, don’t worry, you are not on your own, as you have a lot of very good beginner friendly websites, online social platforms (especially the official REAPER forum), apps and videos to go further, no matter your direction. Here is a few selection, in english, but I encourage you take a look at some resources in your own language as well (if it is not english), there can be some hidden gems, free or paid!
REAPER Tutorials
These tutorials resources will help you get familiar with REAPER.
-

ReaperMania Video Tutorials
The best video tutorials YouTube channel to start learning REAPER.
Note that Kenny’s videos above are also on official reaper website. Check the series This is REAPER 7, which is probably the best place to start. He also has series for Recording, Mixing, MIDI, etc…
-

ReaperBlog
The “Unofficial” REAPER blog.
-

ReaperTips
Handy REAPER tips presented in a brand new shiny website.
There are other YouTube courses which seems complete. I haven’t personally watch them entirely, as I’m not the target audience, but they seems quite good:
- Adam Steele – REAPER 101: A series of video about learning REAPER, especially for mixing and recording
- Envato – Reaper Tutorial for Beginners: A 3:30 hours long video which should help you started
- I also see various Beat Making on REAPER related video that you may be interested in.
Don’t miss other resources I could reference on ReaLinks – Tutorials categories! If you are more into text than video, you can for eg. check the REAPER Guide, or my exhaustive REAPER review, which will tell you more about REAPER history, what it can do, what is the main philosophy behind the software etc.
There are also some paid formation online like the French REAPER 7 Elephorm video formation, which even showcase ReaPack. I encourage you to chose one in your language. Formations are great cause they have a progression, it is not just random subjects one after the other.
Anyway, check the release date of these content. REAPER evolves quickly, you don’t want to miss up-to-dates features!
Extras
The following resources are not REAPER related, but general audio and music stuffs that I like to share as well. I will not flood with everything I know and watched, so here just a tiny selection:
Instrument Practice
- Yousician: Nice software to learn for bass, guitar and ukulele, with scrolling tablature and audio-recognition. Also piano and vocals.
- Melodics: Learn finger drumming with scrolling guides. It can do e-drums and piano as well.
Audio Theory
- YouTube – Audio University: Nice channel about audio, very pedagogic. Check the playlists, it has various Studio 101, Microphone 101 etc meant for beginners
- YouTube – Akash Murthy: Great video about audio theory, especially on the Digital Audio Fundamentals playlist
- YouTube – Dan Worrall: More advanced, but a lot stuffs debunking misunderstood mixing concepts. His products reviews (like the one for Fab Filters) are so good that you can consider it as mixing course!
- Syntorial: Paid app to learn audio subtractive synthesis, with interactive exercises
Music Theory
- Ableton – Learning Music: free web app to teach you the ultra basics of music composition. Must see for absolute beginners ⭐
- Building Blocks: Advanced web app training in music theory, mostly for pattern based music. This is a must-see resource as well, I made a review about it! ⭐
- YouTube – Synthnet: Lots of mixing and composing tricks exposed in very colonized and dynamic videos
There is also a lot of extremely advanced videos about composing on YouTube, but this is often genre specific. Here are some of my favorite:
- 12tone: Various genre and specific songs in depth-analysis
- GeoffPlaysGuitar: Very inspiring composition breakdowns of Argent/DOOM-game-like metal tracks
- David Bruce Composer: Composition concepts explications, for orchestra
- SugarpillProductions: All about Punk and Rock composition and guitar tricks
Mixing
- Reaperblog – Beginner Mixing Course: Free 3 hours course dedicated to mixing for beginners on REAPER, so this might be the perfect place to start!
- YouTube – Joey Sturgis Tones: A lot of very digestible 10 minutes long arrangement and mixing tricks, mostly for rock and metal, and often on REAPER
Conclusion
That was a lot, I hope it went fine for you! Now take a break, and come back just after to really start making some sounds with REAPER, any sound, by recording yourself, using samples or virtual instruments. This is where the fun is! You just need to a bit of practice now, and you will get better at it, step by steps!
Don’t hesitate to join local or online social groups to discuss about composing, mixing and reaper stuffs. Having feedback and help from real humans (not IA) can really eliminate a lot of struggle in your learning process.
Oh, don’t forget to update your softwares (REAPER, Plugins, and ReaPack packages) regularly! REAPER updates is frequent and often bring some very appreciable enhancements an fixes that it would be too bad to miss. ReaperBlog videos are the best to review what is new in each REAPER versions.
Anyway, if you enjoyed this article and found it useful, please support my work. I took hours to select all the info and to write them down. It is not written by a thoughtless IA. So any support will be very appreciated. 🥰 And don’t forget to share this article to all your fellow REAPER companions!
If you want to discuss this, I created a dedicated thread on REAPER forum.
Time to make sound and music now. Have fun! 🤘

